Showing posts with label Blogger. Show all posts

7.02.2015

How to remove Border/Shadow from Blogger post images

You might have noticed in your blog that the images have a white border/shadow to it. If you do not want it (like I didn't want them) you can use this simple procedure to remove them completely from all blogger images.

How to remove Border/Shadow from Blogger post images


Here is how you do it in two simple steps:

1. Go to your Blogger Dashboard --> Template --> Customize

How to remove Image Border/Shadow from Blogger post images


2. Select Advanced --> Add CSS and add the following code and click Apply to Blog.

.post-body img, .post-body .tr-caption-container, .Profile img, .Image img,
.BlogList .item-thumbnail img 
 {
  padding: 0 !important;
  border: none !important;
  background: none !important;
  -moz-box-shadow: 0px 0px 0px transparent !important;
  -webkit-box-shadow: 0px 0px 0px transparent !important;
  box-shadow: 0px 0px 0px transparent !important;
}


How to remove Image Border/Shadow from Blogger post images


Technically you are setting the border to none and the shadow to transparent (with all metrics as 0px)


3. This is how your image would have looked like before.

How to remove Image Border/Shadow from Blogger post images


4. After applying steps 1 and 2, you will end up with images like this:

How to remove Image Border/Shadow from Blogger post images


So simple isn't it? Try this if you are annoyed with the white shadow/border like effect on the image and get this absolute border free clear and exact image you want for your posts and pages.

How to remove Image Border/Shadow from Blogger post images


You can read the previous post of this series here: Custom Pin-it hover image for blogger images

Want more blogger tutorials? Visit here for the entire list.


6.25.2015

Create a Custom PINTEREST hover button in Blogger Images

Last post on Blogger was on how to create social media icons for your blogger sidebar. You can view the tutorial here. Today is gonna be another fun tutorial to add an extra touch to your blog images so that readers can easily Pin the images they like to their Pinterest Board. (And believe me, this one is real useful to me as well, as I directly pin my images using this).

Create a Custom PINTEREST hover button on images in Blogger


I'l walk you through these simple steps on how to create your own customized Pin-it Hover button for your blogger images.


1. Go to PicMonkey. Select Design. You can select either Square or Custom for the canvas.

Create a Custom PINTEREST hover button on images in Blogger


2. Enter the size for the canvas. I am going keep mine as 80 px x 80 px and then crop if its big.

Create a Custom PINTEREST hover button on images in Blogger


3. Set the canvas as 'Transparent'.

Create a Custom PINTEREST hover button on images in Blogger


4. Enter any overlay you want or add your own. Change its color or size.

Create a Custom PINTEREST hover button on images in Blogger


5. Add the text 'Pin it' or 'Pin me' or anything you like. :)

Create a Custom PINTEREST hover button on images in Blogger


6. Save the image as .png (very very important)

Create a Custom PINTEREST hover button on images in Blogger


7. Upload your image to image hosting website like Photobucket. Copy the URL.

Create a Custom PINTEREST hover button on images in Blogger


8. Now go to your Blogger Dashboard -->  Template --> Edit HTML

Create a Custom PINTEREST hover button on images in Blogger


9. Click onto the coding part and select CTRL + F (Find) then search for </body>

Create a Custom PINTEREST hover button on images in Blogger


10. Once you locate the </body> add the following code above this:

<script>
//<![CDATA[
var bs_pinButtonURL = "your pin it image URL.png";
var bs_pinButtonPos = "center";
var bs_pinPrefix = "";
var bs_pinSuffix = "";
//]]>
</script>

<script src='http://ajax.googleapis.com/ajax/libs/jquery/1.8.2/jquery.min.js' type='text/javascript'/>
<script id='bs_pinOnHover' src='http://greenlava-code.googlecode.com/svn/trunk/publicscripts/bs_pinOnHoverv1_min.js' type='text/javascript'>
// This Pinterest Hover Button is brought to you by bloggersentral.com.
// Visit http://www.bloggersentral.com/2012/11/pinterest-pin-it-button-on-image-hover.html for details.
// Feel free to use and share, but please keep this notice intact.
</script>


Create a Custom PINTEREST hover button on images in Blogger


NOTE: 
  • Replace the red portion with the image URL
  • Blue portion with the alignment options: topleft, topright, bottomleft, bottomright, center (default state)


Create a Custom PINTEREST hover button on images in Blogger


11. Click Save Template. now write a blog post with an image and publish it.

Create a Custom PINTEREST hover button on images in Blogger


12. View your blog / post and hover over the image to see the 'Pin-it' button

Create a Custom PINTEREST hover button on images in Blogger

13. Try with other alignment options if you want the button elsewhere. (the below image alignment for pin-it button is top-left)

Create a Custom PINTEREST hover button on images in Blogger
14. And YEAH !!!! You now have your own customized Pin-it hover button for your blog images. :) Jump with Joy :) 


Make any shape or style you want to match your blog theme and enjoy :) 


6.04.2015

Create Social Media Icons For Blogger Sidebar using PicMonkey & Image-Maps

This weeks Blogger tutorial is on how to create social media icons for your blogger sidebar using simple technique which includes PicMonkey and Image-Maps.

Create Social Media Icons For Blogger Sidebar using PicMonkey & Image-Maps


1. Before you create your socila media icon bar for your sidebar, let us check how big your image on the sidebar should be (this technique can be applied for any sidebar image gadget you add). Go to your Blogger Dashboard. Click Layout --> Add a Gadget.


Create Social Media Icons For Blogger Sidebar using PicMonkey & Image-Maps


2. Select the Image option. 

Create Social Media Icons For Blogger Sidebar using PicMonkey & Image-Maps


3. Scroll down to see the 'Shrink to fit' option. Below this you will see the pixel size. This is the size you want your sidebar images to be. Not more than this, but can be smaller. 


Create Social Media Icons For Blogger Sidebar using PicMonkey & Image-Maps


4. Before designing the social media icons, you need to have the icons vector/ silhoutte images of the icon. There are various websites offering free social media icons and just the silhoutte. Download the icons from the website to your computer. This will further be used in Picmonkey to design your own icons. 

Some websites offering free social media icons:
  • http://theblogdesignernetwork.com/2011/08/free-social-icon-silhouettes/
  • http://www.pixelfrau.com/black-social-media-icons/
  • http://visionwidget.com/free-social-media-icons.html


5. Go to PicMonkey --> Design --> Custom

Create Social Media Icons For Blogger Sidebar using PicMonkey & Image-Maps


6. Enter the Pixel size (250) for length and height as > or < 100 (your choice). 

Create Social Media Icons For Blogger Sidebar using PicMonkey & Image-Maps


7. Add Overlay. I am adding circles for the base. Change the color and size to match your blog. (You can skip this step if you do not want a background for the icons).

Create Social Media Icons For Blogger Sidebar using PicMonkey & Image-Maps


8. Select 'Your Own' in Overlays tab, browse for the icons you downloaded and select one. 

Create Social Media Icons For Blogger Sidebar using PicMonkey & Image-Maps


9. Change the color, bring it above the circle and position it well. Now Right click on the circle to Duplicate Overlay for the rest of the icons (to have consistent color and size). 

Create Social Media Icons For Blogger Sidebar using PicMonkey & Image-Maps


10. Add a line or a rectangle above and below the icons to keep them aligned in a straight line.

Create Social Media Icons For Blogger Sidebar using PicMonkey & Image-Maps


11. Keep adding your social media icons and then remove the lines added.

Create Social Media Icons For Blogger Sidebar using PicMonkey & Image-Maps


12. Now you can crop the excess region above and below. (optional)

Create Social Media Icons For Blogger Sidebar using PicMonkey & Image-Maps


13. Save the file as .png. (Very important step)

Create Social Media Icons For Blogger Sidebar using PicMonkey & Image-Maps


14. Upload the image in an image hosting website (eg: Photobucket) Get the link of the image. (should end in .png)


15. Go to Image-Maps. Enter the image URL and select Start Mapping.

Create Social Media Icons For Blogger Sidebar using PicMonkey & Image-Maps


16. Check your image and then select click to Continue.

Create Social Media Icons For Blogger Sidebar using PicMonkey & Image-Maps


17. Right click on the first icon and select Create Rect.

Create Social Media Icons For Blogger Sidebar using PicMonkey & Image-Maps
18. Draw a Rectangle around the icon and you will get a box like this to fill the details.
  • Enter the URL you want to visit when clicked on that image. 
  • enter Title (this will be displayed when the mouse is hovered above that icon)
  • Enter Alt

Create Social Media Icons For Blogger Sidebar using PicMonkey & Image-Maps


19. Go to Settings Tab
  • Change the Background color to White #fff
  • Opacity --> 0 to make it clear.
  •  Border color to white #fff

Create Social Media Icons For Blogger Sidebar using PicMonkey & Image-Maps


20. Continue for all other icons. Finally, right click outside and select Get code.

Create Social Media Icons For Blogger Sidebar using PicMonkey & Image-Maps


21. Select HTML Code. Scroll down and copy the code.

Create Social Media Icons For Blogger Sidebar using PicMonkey & Image-Maps


Create Social Media Icons For Blogger Sidebar using PicMonkey & Image-Maps


22. Go back to blogger. go to Dashboard and select Layout --> Add a Gadget --> HTML/Javascript.

Create Social Media Icons For Blogger Sidebar using PicMonkey & Image-Maps


23. Enter the title and paste the code. Then save.

Create Social Media Icons For Blogger Sidebar using PicMonkey & Image-Maps


24. Rearrange the position of these icons if ypu want and then click Save Arrangement.

Create Social Media Icons For Blogger Sidebar using PicMonkey & Image-Maps


25. Now View Blog to see the icons on your sidebar. Click on each and check if its working. Or check if you have entered the right URL for each.  

If your sidebar is towards the left, you can center align it by adding:
<div align="center">  before the code and </div> after the code.

Create Social Media Icons For Blogger Sidebar using PicMonkey & Image-Maps


Image used:  (You can use this image for your blog/website. Rigth click and save image. Upload it in image hosting website. Copy URL and use it in Image-Maps)


Code:

<div align="center">
<img id="Image-Maps-Com-image-maps-2015-05-29-062705" src="imagelink.png" border="0" width="250" height="66" orgWidth="250" orgHeight="66" usemap="#image-maps-2015-05-29-062705" alt="" />
<map name="image-maps-2015-05-29-062705" id="ImageMapsCom-image-maps-2015-05-29-062705">
<area  alt="Facebook" title="Facebook" href="http://www.yourfacebookpage.com/" shape="rect" coords="4,10,49,57" style="outline:none;" target="_self"     />
<area  alt="Twitter" title="Twitter" href="http://www.yourtwitterpage.com/" shape="rect" coords="49,10,100,58" style="outline:none;" target="_self"     />
<area  alt="Instagram" title="Instagram" href="http://www.yourinstapage.com/" shape="rect" coords="96,9,149,59" style="outline:none;" target="_self"     />
<area  alt="Pinterest" title="Pinterest" href="http://www.yourpinitpage.com/" shape="rect" coords="150,3,197,58" style="outline:none;" target="_self"     />
<area  alt="Google+" title="Google+" href="http://www.yourgpluspage.com/" shape="rect" coords="200,5,249,58" style="outline:none;" target="_self"     />
<area shape="rect" coords="248,64,250,66" alt="Image Map" style="outline:none;" title="Image Map" href="http://www.image-maps.com/index.php?aff=mapped_users_0" />
</map>
</div>


(Enter the respective URL instead of the red text. Use the image, map and get the code. Use the code in HTML/Javascript Gadget)


5.14.2015

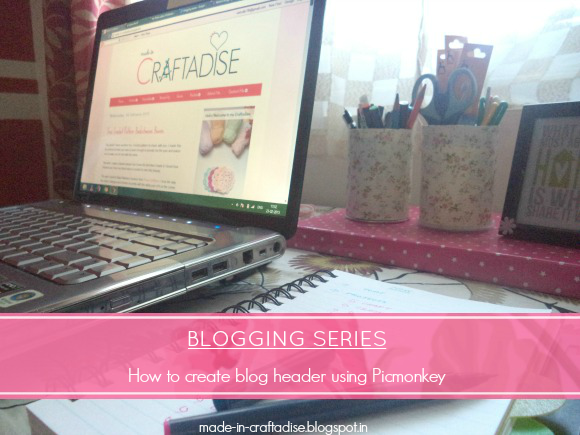
How to: Create a Blog Header using Picmonkey

This post explains you how to create your own blog header in a very easy way using Picmonkey. Picmonkey is so easy to use and I am just loving every tools it contains. Now let us see how we can create a blog header using the same.

How to: Create a Blog Header using Picmonkey


1. Go to Picmonkey website.

2. Hover above Design tab and select Custom.

How to: Create a Blog Header using Picmonkey


3. Enter the dimensions of your header { total blog width - (40 px * 2 [on both sides] )  }  
i.e. ( total blog width in px - 80 px )  My blog width  is 960, so 960 px - 80 px = 880 px. Height can be customized to your needs.

How to: Create a Blog Header using Picmonkey


4. Now add text, adjust the size, color, etc.

How to: Create a Blog Header using Picmonkey


5. Nest you can go to Overlays tab and add whatever designs or shapes you want.

How to: Create a Blog Header using Picmonkey


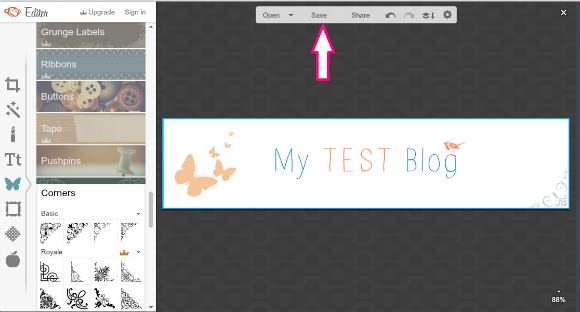
I added rectangular border, butterflies, a bird and a corner accent {to keep it simple and clean}. You can try your hands on everything to make it look yours and match your blog.

How to: Create a Blog Header using Picmonkey


6. Once you have completed, click the SAVE button.  

How to: Create a Blog Header using Picmonkey


7. Save As .png (Do not forget this step)

How to: Create a Blog Header using Picmonkey


8. Now go to Blogger --> Layout --> Click Edit button in the Header widget.

How to: Create a Blog Header using Picmonkey


9. Click Choose File and select the image.

How to: Create a Blog Header using Picmonkey


10. Then select Instead of title and description. Then Click Save.

How to: Create a Blog Header using Picmonkey


11. Click Save Arrangement and View Blog to view your blog page with the header. 

How to: Create a Blog Header using Picmonkey


12. The blog with the header is ready and set. 

How to: Create a Blog Header using Picmonkey


NOTE:

If your header doesn't fit inside or getting cropped in one corner, adjust the size of your header. 

1. Select Shrink to fit in Step (10) 

(or)

2. Check for the header size like below and then create your header.

check size of header in blog


This way you can never go wrong with your sizing. Try out with different fonts, colors matching your blog and overlays. You can add your own fonts and overlays as well. Try this and create your own blog header that looks elegant.


Have a great day! Take care :)