This post explains you how to create your own blog header in a very easy way using Picmonkey. Picmonkey is so easy to use and I am just loving every tools it contains. Now let us see how we can create a blog header using the same.
1. Go to Picmonkey website.
2. Hover above Design tab and select Custom.
3. Enter the dimensions of your header { total blog width - (40 px * 2 [on both sides] ) }
i.e. ( total blog width in px - 80 px ) My blog width is 960, so 960 px - 80 px = 880 px. Height can be customized to your needs.
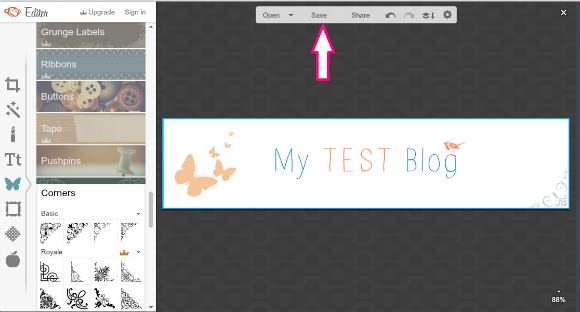
4. Now add text, adjust the size, color, etc.
5. Nest you can go to Overlays tab and add whatever designs or shapes you want.
I added rectangular border, butterflies, a bird and a corner accent {to keep it simple and clean}. You can try your hands on everything to make it look yours and match your blog.
6. Once you have completed, click the SAVE button.
7. Save As .png (Do not forget this step)
8. Now go to Blogger --> Layout --> Click Edit button in the Header widget.
9. Click Choose File and select the image.
10. Then select Instead of title and description. Then Click Save.
11. Click Save Arrangement and View Blog to view your blog page with the header.
12. The blog with the header is ready and set.
NOTE:
If your header doesn't fit inside or getting cropped in one corner, adjust the size of your header.
1. Select Shrink to fit in Step (10)
(or)
2. Check for the header size like below and then create your header.
This way you can never go wrong with your sizing. Try out with different fonts, colors matching your blog and overlays. You can add your own fonts and overlays as well. Try this and create your own blog header that looks elegant.
Have a great day! Take care :)
PREVIOUS POST ---> How to: Create a blog, write a blog post and add a sidebar widget


No comments:
Post a Comment
Thank you for taking time to stop by. I would love if you leave some inspiring comments about the post. To avoid spam and unwanted users from leaving a comment, your comment will be verified and posted in sometime. Thank you :)